Inventory in Excel: Benefits of doing it in Microsoft

Managing the inventory control of a company or business in Excel is one of the best decisions we can make. We will speed up the product entry and exit process and reduce the margin of error.
What is a company's inventory?
The inventory of a company is the detailed, organized record with all the information about the elements that make it up. In that sense, an inventory can be made of both the company's furniture and the products or goods that make up its business area.
What is inventory control for in a company?
Inventory control is a vital tool for companies, because it allows you to maintain the organization and detail of the products or goods that enter and leave. In this way, it is possible to know the existence of a product, monitor its sale and also its replacement.
In that sense, sales and inventory control in Excel is a necessity for any organization to manage all its material assets.
What elements should an inventory contain in Excel?
If you want to create your own stock and inventory control in Excel, you must take into account several essential elements for its preparation.
Products in stock
First of all, we must have a column whose cells we will use to enter the products we have in stock. Every time there is a new one, we must add it to the list.
Quantity of products in stock
Next to the column of products in stock, we will have one aimed at referencing their quantity. This represents the basis of our inventory control in Excel.
Product inputs and outputs
It is two columns. The input function has the purpose of recording the quantity of products that have come into stock when purchased. For its part, the output refers to the quantities that are being extracted from the warehouse.
Additional product information
Finally, we can add an optional column aimed at complementary product data. This can range from the internal code used for registration, the location within the warehouse or some description.
Benefits of carrying out stock and inventory control in Excel
Managing stock and inventory control in Excel is a move that will save us many setbacks and speed up all product entry and exit calculations.
Know current inventory quantities
Inventory control in Excel will allow us to have updated and immediately available information on the quantities of products in stock.
Constantly monitor stock
As it is a document that we have at hand, inventory control will allow us to monitor the warehouse as frequently as we want.
Manage stock orders
Inventory control allows us to be prepared to manage the replacement of products on time.
Save time searching for products
Inventory control in Excel allows us to save the work of verifying the location of a product within the warehouse by simply opening the file.
Related questions
Within an inventory control in Excel we can also calculate the maximum and minimum quantities of the product to avoid shortages and surpluses. To do this, we must know two pieces of information: the quantity sold of the item in a period of time and the number of times it was replaced in that period.
With this information, it is just a matter of generating a table with the columns: Items, Quantity Sold, Replacement, Minimum and Maximum.
In the “Minimum” column we will enter the following formula:
=IF(IF(C2=1, ROUND((B2 * 0.015) + B2, 0), ROUND(((B2 * 0.015) + B2)/C2, 0))=0, 1, IF(C2=1, ROUND((B2 * 0.015) + B2, 0), ROUND(((B2 * 0.015) + B2)/C2, 0)))
For its part, in the “Maximum” column we will enter this:
=IF(ROUND((B2 * 0.02) + B2, 0)=0, 1, ROUND((B2 * 0.02) + B2, 0))
In this way, we will obtain the values we need automatically.
To create your own Excel inventory with formulas to automate calculations, follow these steps below.
• Open a blank Excel workbook.
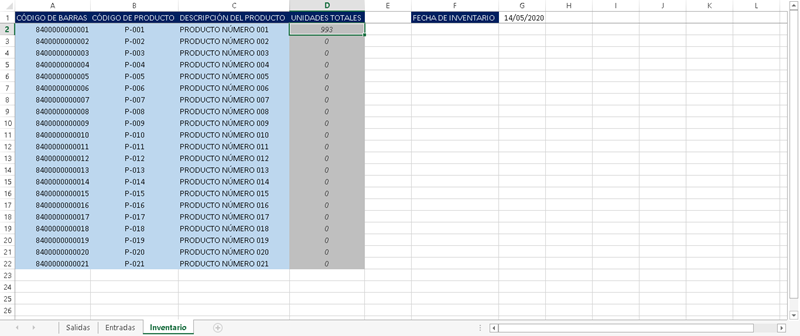
• Create 3 tabs: Inventory, Inputs and Outputs.
• Generates 7 columns in the Inventory tab with the names: code, product, description, initial stock, receipts, exits and total.
• In the Entries tab you will have to enable 5 columns: invoice, date, code, product and quantity.
• In the Outputs tab we will create the same 5 columns from the previous step.
• Select the entire table and click “Insert”.
• Click on Tables and in the pop-up window check the option “the table has headers” and click OK. Repeat the same with the rest of the eyelashes.
• Go to the Inventory tab and enter the code of your products.
• Go back to the “Entries” tab and select the entire “Code” column.
• Go to the “Data” menu and click on the data validation button.
• In the “Allow” drop-down menu, select “List”.
• Click on the “Origin” section, return to the Inventory tab and select the entire “Code” column.
• Repeat the previous process on the Outputs tab to populate the “Products” column of the “Inventories” tab from a drop-down list.
• Insert this formula in the “Inputs” column of the “Inventory” tab =SUMIF(ENTRIES[Code],[@Code],ENTRIES[Quantity])
• Insert this formula in the “Outputs” column of the “Inventory” tab =SUMIF(OUTPUTS[Code],[@Code],OUTPUTS[Quantity])
• Insert this formula in the “Total” column
=[@[Initial stock]]+[@Inputs]-[@Outputs]
In this way your Total in Stock column will be updated based on the movements of entries and exits. However, this is something that you can learn in depth in our Basic Excel Course.

Vito Hernandez
Graduate in Social Communication and Journalist. Mainly creative before everything. Now writing about Excel and Human Resources for the common man.