Cómo hacer macros en Excel

Macros en Excel: Lo básico paso a paso
¿Qué es una macro en Excel?
Una MACRO es una acción o serie de acciones que se pueden ejecutar todas las veces que quieras, ya que las instrucciones quedan guardadas dentro de un Libro de Excel para ser ocupada cuando necesites. Con macros en Excel puedes crear y modificar funciones, formularios, tablas, aplicaciones complejas, etc. Es como cualquier función de Excel pero que puedes programar para que haga lo que tú quieras.
¿Para qué sirven las macros en Excel?
Finalidad: Una Macro permite automatizar tareas repetitivas de Excel. Con un solo click se ejecutan todas las tareas que dejes programadas.
Ventajas: Evitas errores, optimizas tu tiempo y te da mayor orden para trabajar.
¿Cómo habilitar las macros en Excel?
Antes de crear la macro, debes tener visible la pestaña de “Programador” en Excel.
Si tienes Windows sigue estos pasos:
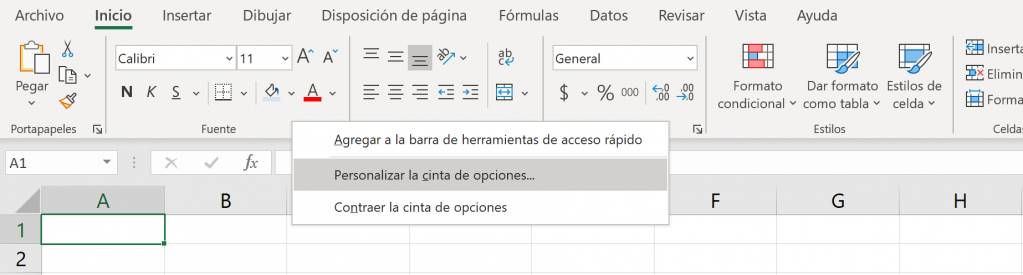
- Haz click derecho en cualquier parte de la cinta de opciones y haz click en “Personalizar la cinta de opciones”.
- Al abrirse el cuadro de opciones, en el recuadro de la derecha, haz click en el cuadrado de “Programador”.
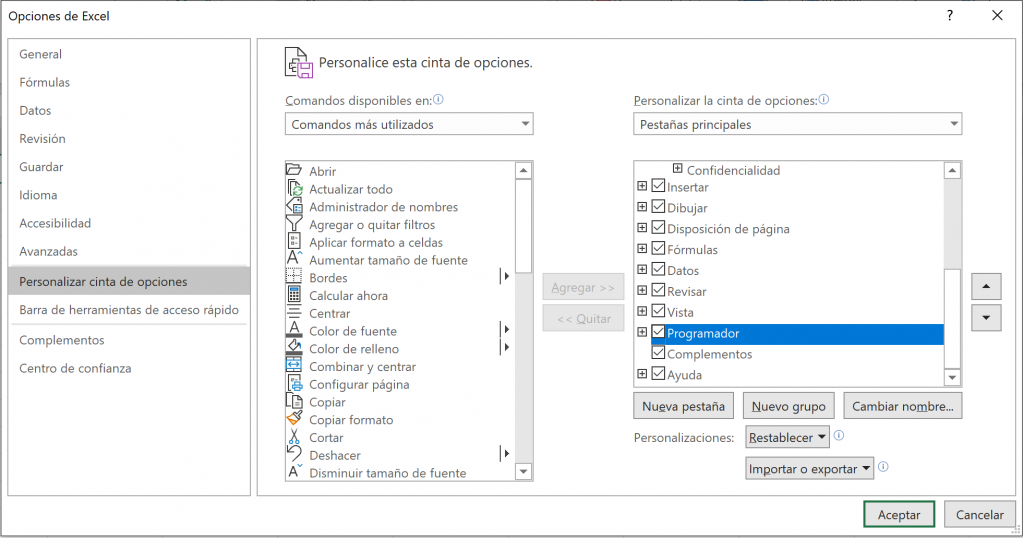
- Haz click en “Aceptar”.
- Vas a encontrar la pestaña de “Programador” al lado de la pestaña “Vista”.
Si tienes Mac sigue los siguientes pasos:
- Haz click en “Excel” (arriba a la izquierda)
- Haz click en “Preferencias”
- Selecciona la sección de “Barra de Herramientas y cinta de opciones”
- Al abrirse el cuadro de opciones, en el recuadro de la derecha, haz click en el cuadrado de “Programador”
- Haz click en “Guardar”.
- Vas a encontrar la pestaña de “Programador” al lado de la pestaña “Vista”.
¿Cómo hacer macros en Excel?
Hay dos maneras de crear una macro en Excel, puede ser a través de:
- Grabadora de macros: Esta herramienta es ideal para quienes no saben programar pero quieren utilizar macros. Bajo esta modalidad, Excel va grabando los click y teclas que apretas para seguir luego las mismas instrucciones. En este artículo se explicará cómo aplicar esto.
- Visual Basic para Aplicaciones (VBA): es el lenguaje en que se programan las macros. Excel tiene un editor de VBA que permite la creación y modificación de Macros a través de este lenguaje. Si es que sabes algo de programación o sabes VBA esto puede ser preferible. Para profundizar en cómo crear macros con VBA puedes ver el artículo “Dominando del VBA”.
Tip Ninja: una práctica común y muy útil es complementar ambos: hacer una grabación para crear rápido una primera versión de la macro y luego hacer algunos cambios a través de VBA teniendo así más opciones y flexibilidad.
Tip Ninja: Cuando quieras guardar un Libro de Excel con macros, se debe guardar como .xlsm, un archivo de Excel que es compatible con macros.
En el siguiente video puedes ver un ejemplo de una macro y entender mejor qué son:
Grabando macros
Para comenzar, vamos a crear una macro que cambia el formato de la celda a porcentaje.
Tip Ninja: Los nombres de las macros deben empezar con una letra, no se aceptan espacios ni símbolos en los nombres.
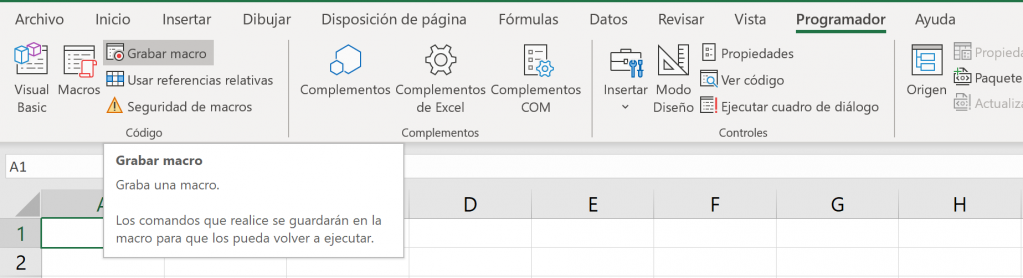
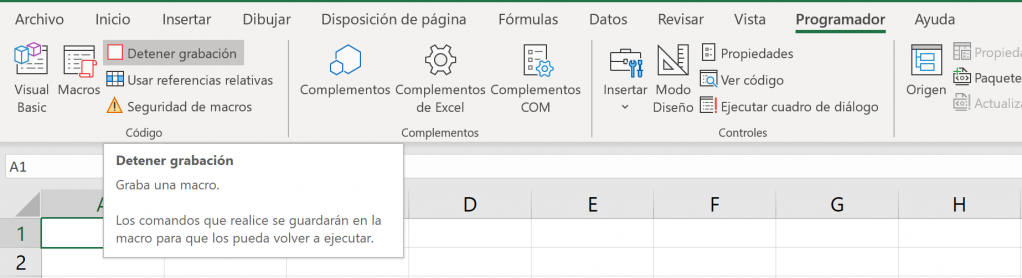
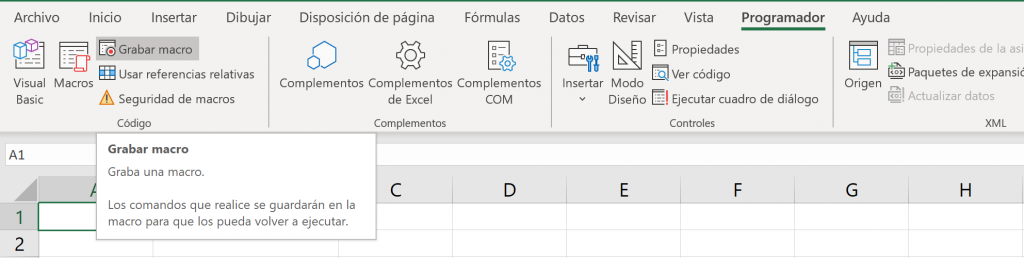
- Selecciona “Grabar macro” dentro de la pestaña “Programador”.
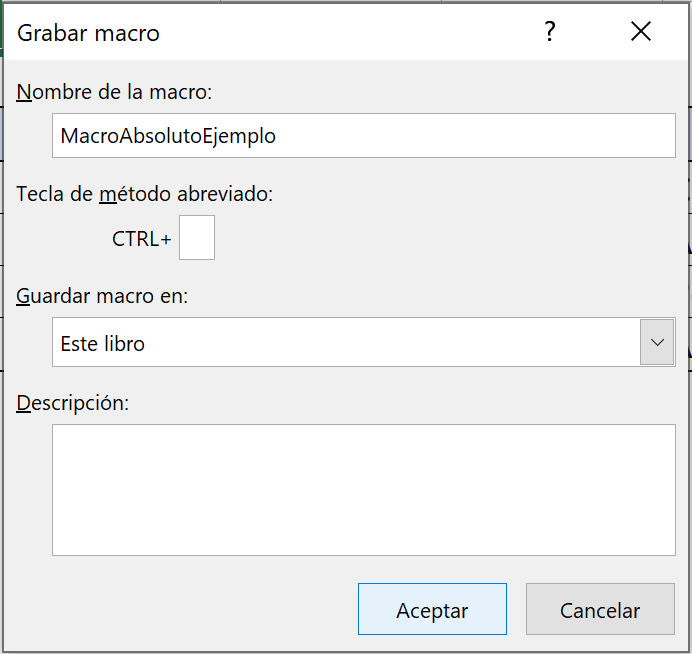
- Para guardar tu macro, primero debes nombrarla. Elige un nombre corto que describa bien lo que hace y que sea fácil de identificar para cuando se tengan muchas macros.
Tip Ninja: Los nombres de las macros deben empezar con una letra, no se aceptan espacios ni símbolos en los nombres.
- Elige dónde guardar la macro. Por lo general, se guarda en el mismo libro de Excel.
Tip Ninja: Si guardas la macro en este Libro y quieres usar esta macro en otro libro, solo necesitas abrir este libro para poder acceder a la macro. Si la guardas en “Libro de macros personal” la macro va a estar disponible en todos tus libros de Excel.
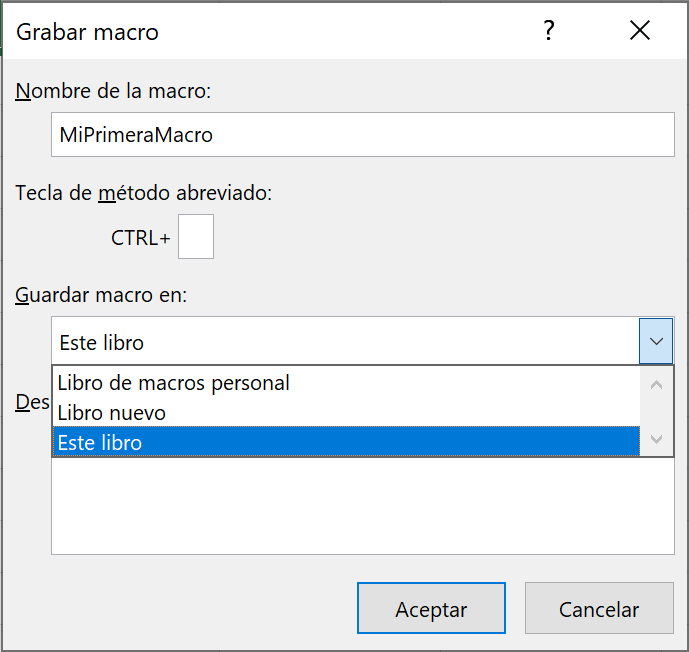
- Opcionalmente, puedes crear un atajo con el teclado. Un atajo es una combinación de teclas asignadas para ejecutar la macro.
Tip Ninja: Aun cuando es útil para una acción que se hace muy seguido, debes tener cuidado de que no se repita con atajos ya existentes. Puedes hacer atajos con Ctrl+Shift+letra para evitar este tipo de problema.
- De manera opcional, puedes añadir una descripción. Es útil para cuando hay más de una persona que vaya a trabajar con estas macros.
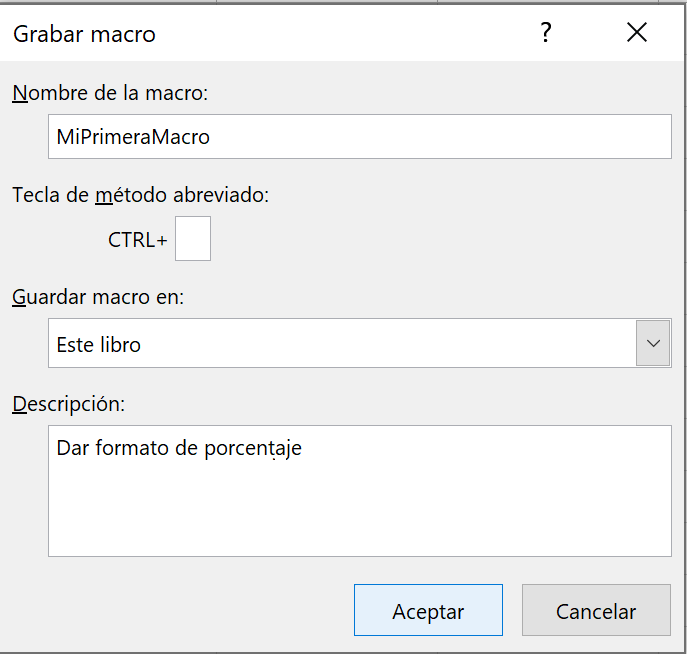
- Haz click en ”Aceptar”.
- Luego, debes hacer las acciones que quieres repetir. En este caso, haz click en Inicio y luego en el formato de porcentaje. No selecciones otra celda ni vuelvas a seleccionar A1 porque cambia la configuración de la macro, en el artículo de “Dominando VBA” se profundiza sobre ese tema.

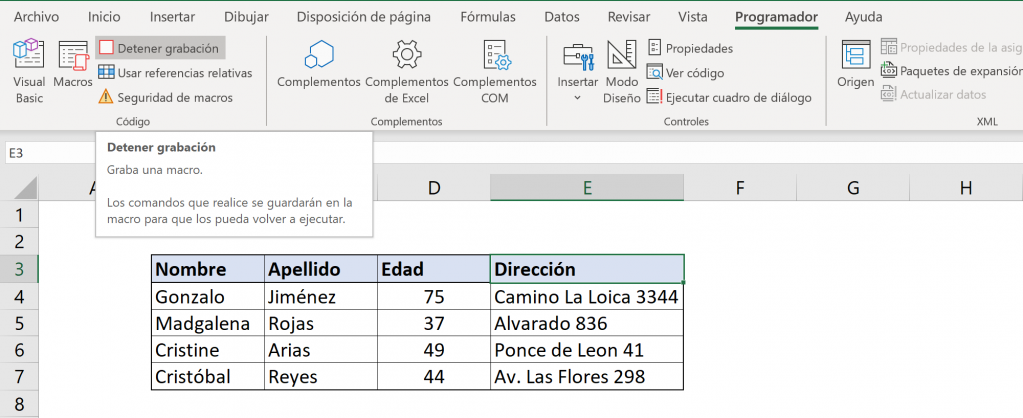
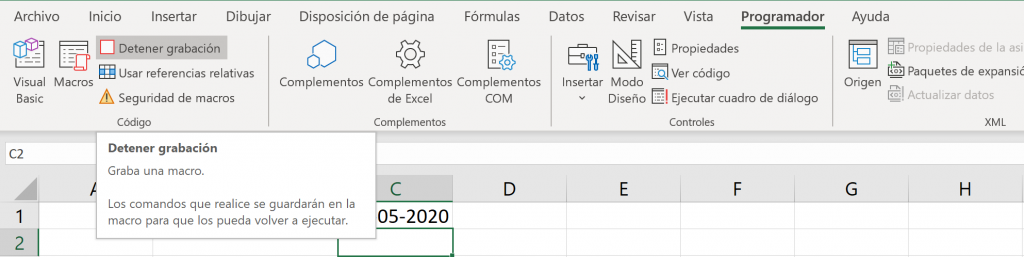
- Selecciona “Detener grabación”.
- ¡Listo! ¡Ya hiciste tu primera macro!
Puedes ver otro ejemplo de cómo crear una macro en el siguiente video:
Luego, para implementar la Macro:
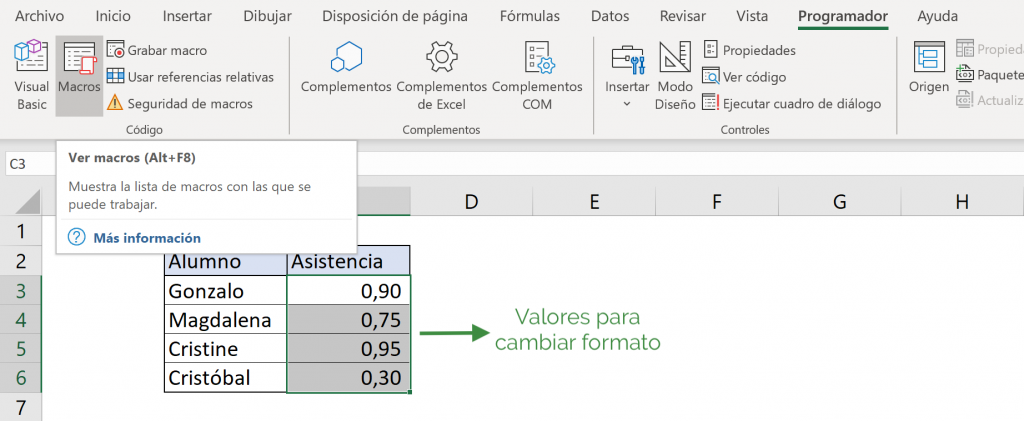
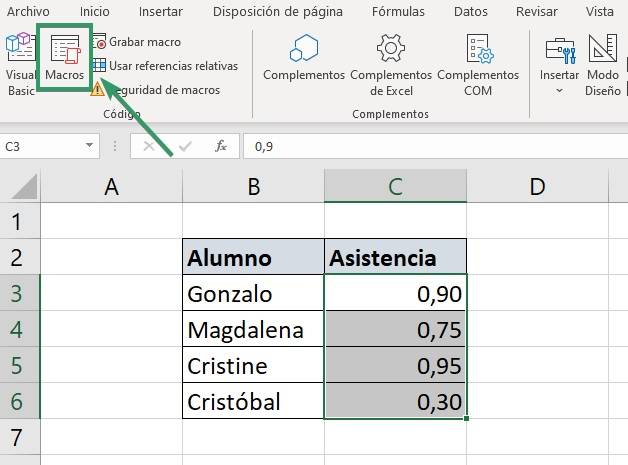
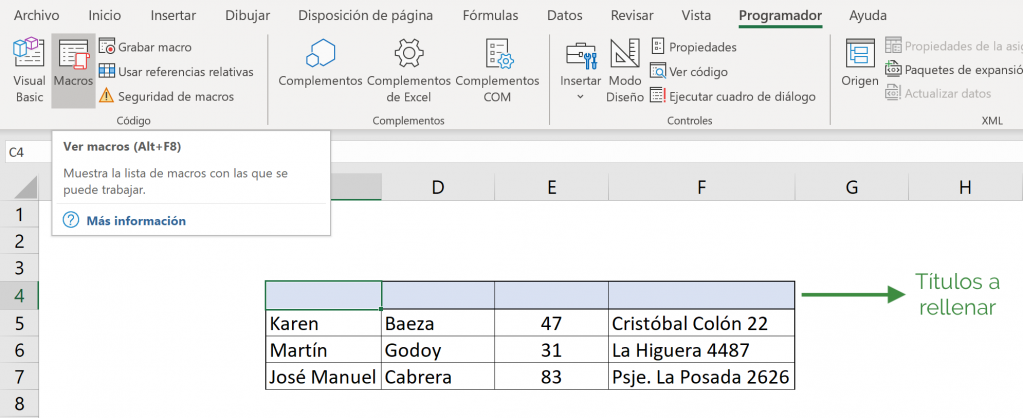
- Selecciona las celdas a las que quieres aplicar la macro y haz click en “Macros” en la pestaña de “Programador”.
Tip Ninja: Puedes usar Alt+F8 en vez de hacer click en “Macros”
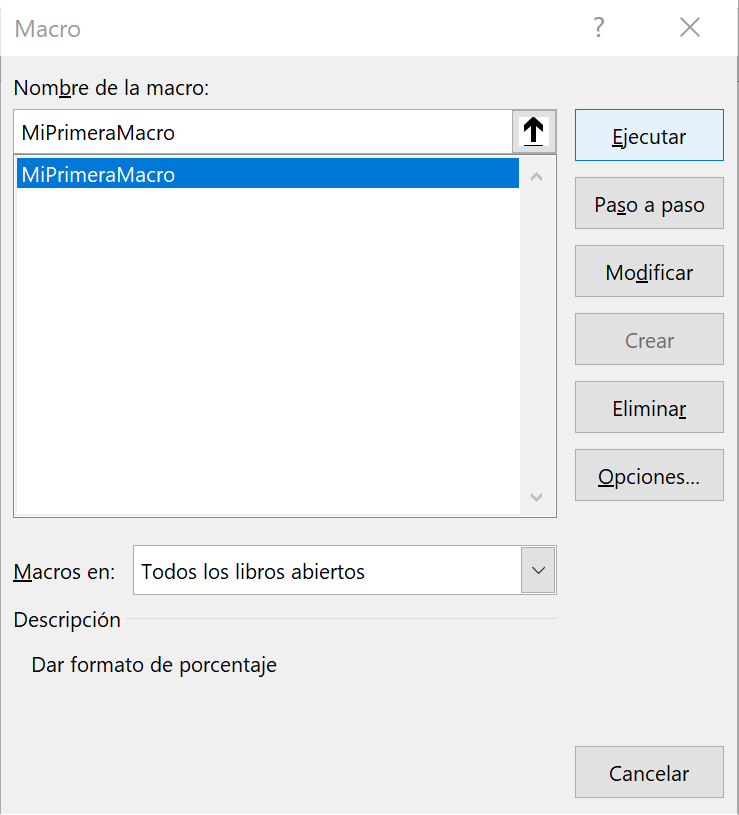
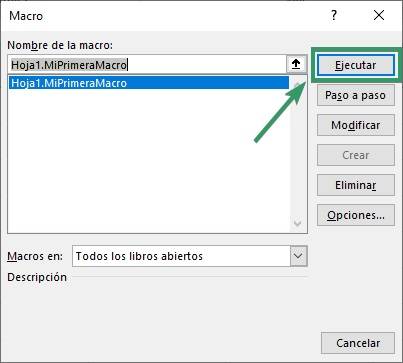
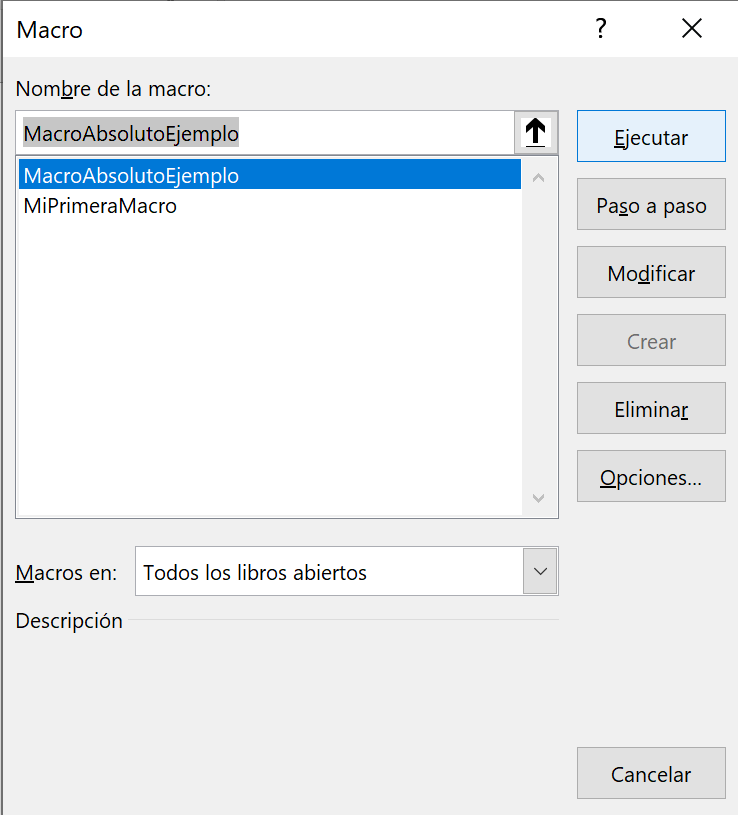
- Seleccionar la macro que quieras ejecutar y haz click en “Ejecutar”.
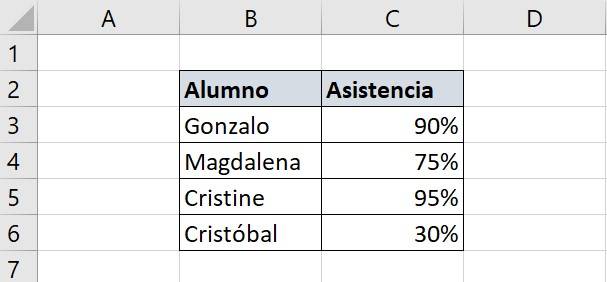
- ¡Eso es todo! Ya se ven los resultados.
También puedes crear un botón que al hacer click en él se ejecute una macro. Puedes ver el siguiente video para aprender a hacerlo:
Programar macros en Excel con Editor de Visual Basic
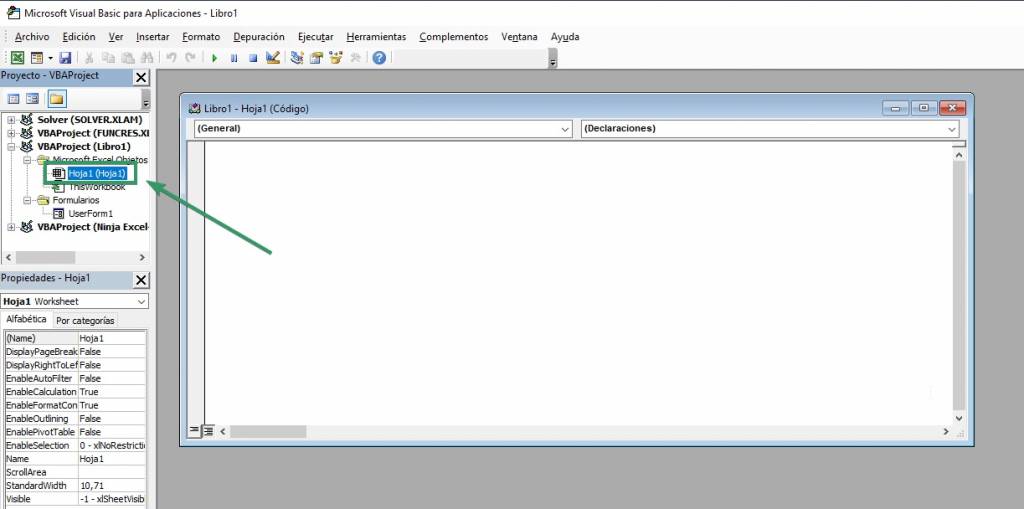
- Selecciona Visual Basic en la pestaña Programador.

- Se abrirá el Editor de Visual Basic y debemos crear nuestra primera macro. Primero debemos abrir nuestra hoja en la que trabajaremos, para esto, haz click en la hoja que deseas la macro.
- Ahora comenzaremos creando la macro para esto indicaremos la subrutina con la palabra “Sub” y luego el nombre del macro, en nuestro caso, MiPrimeraMacro.
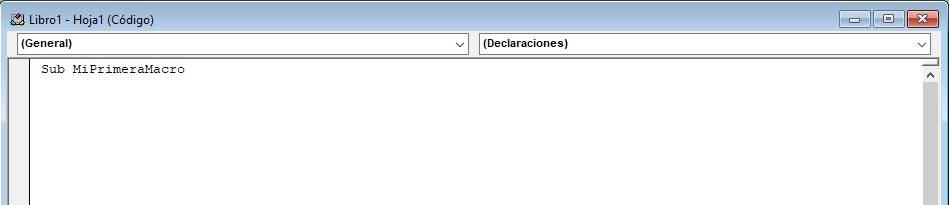
- Hacemos click en Enter para que aparezcan automáticamente los paréntesis al final del nombre y End Sub, que indica el fin de la subrutina, es decir, el fin de la macro.

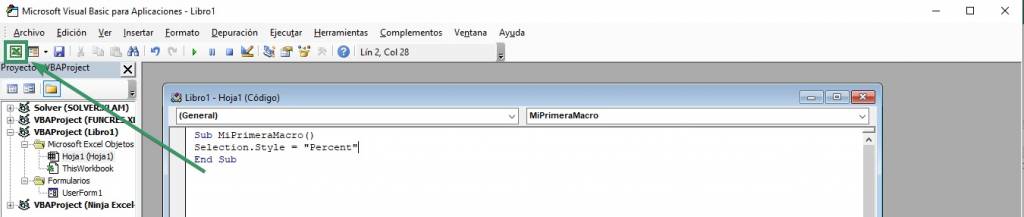
- Ahora entre Sub y End Sub debemos escribir el código de la macro. Como buscamos insertar un porcentaje a las celdas, debemos escribir el código Selection.Style = “Percent”

- Volvemos al Excel haciendo click en el icono de Excel y listo! Ya programamos nuestra primera macro.
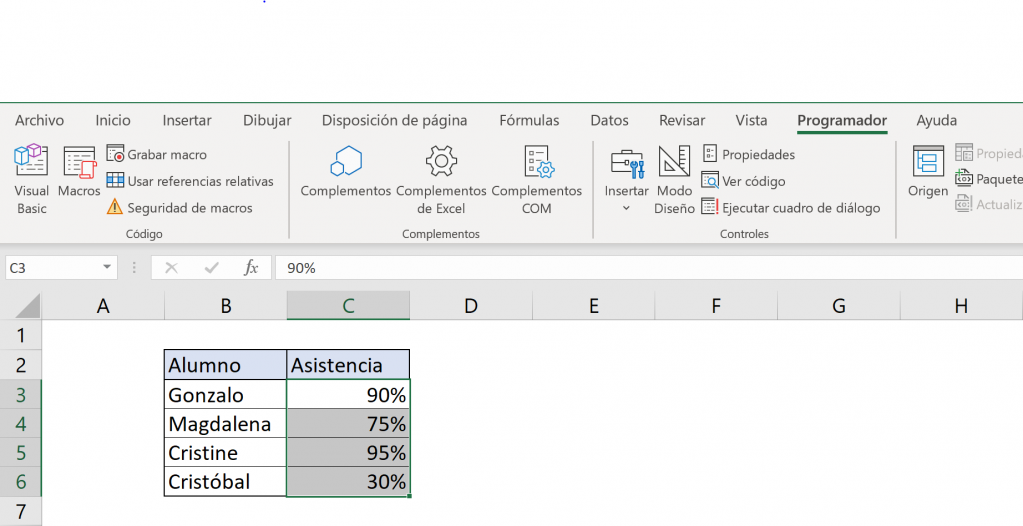
- Ahora, debemos ejecutar nuestra macro para la asistencia de los alumnos, seleccionamos las celdas de las asistencias y hacemos click en Macros.
- Se abrirá un cuadro de diálogo de nuestras macros, seleccionamos la macro que queremos ejecutar, en nuestro caso MiPrimeraMacro y hacemos click en ejecutar.
- Listo! Ahora podemos ver que las asistencias se encuentran en formato de porcentaje.
Uso de referencias relativas en macros
Hay dos tipos de referencias en macros:
- Referencia absoluta: las celdas que selecciones al grabar la macro van a quedar fijas. Es decir, cada vez que ejecutes la macro se van a llenar las mismas celdas siempre, independiente de qué celda tengas seleccionada al ejecutar la macro. La macro se graba en modo absoluto por defecto.
- Referencia relativa: la macro se va a ejecutar en las celdas dependiendo de qué celda estaba seleccionada al ejecutar la macro.
Tip Ninja: Es mejor usar referencias relativas para tener mayor flexibilidad de la ejecución de la macro.
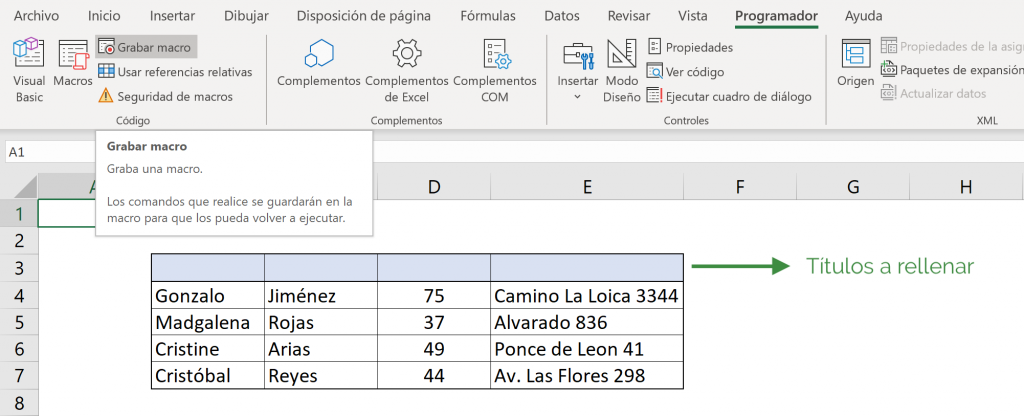
Por ejemplo, todas las semanas exportas una tabla de Excel a la cual debes aplicarle nombres a las columnas de manera periódica. Para esto, grabas una macro de Excel que permite rellenar los nombres de dichas columnas. Veamos qué pasa si hago una macro absoluta versus una macro relativa.
Grabar macros en modo absoluto
- Haz click en “Grabar macro”, nómbrala y guárlada en el Libro que corresponda. Nosotros lo llamaremos “MacroAbsolutoEjemplo”.
- Luego, haz click en B3 y rellena los nombres de las columnas como corresponde y haz click en “Detener grabación”.
- Ahora, cuando te enfretes a otra tabla del mismo tipo, en otro Libro o pestaña y haz click en “Macros”.
- Elige el macro que creaste y haz click en “Ejecutar”.
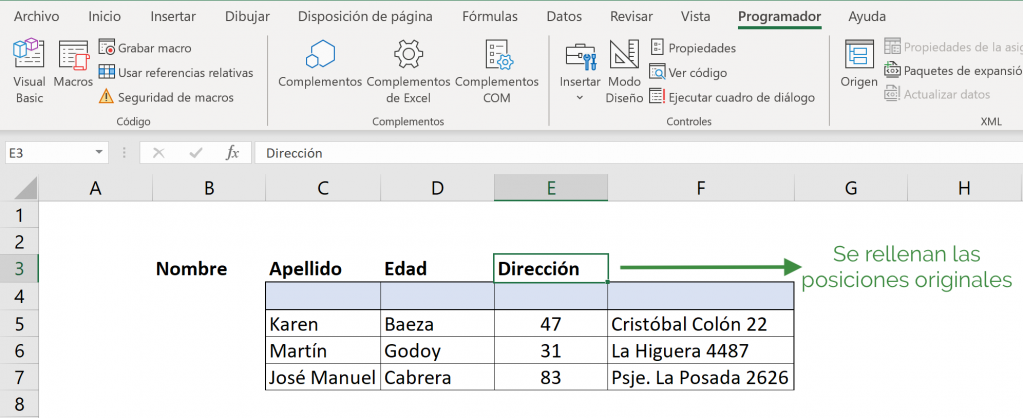
- Fíjate que se escribe en el mismo lugar que cuando creamos el macro. Eso significa que sea “absoluto”: las reglas se siguen al pie de la letra y la instrucción en este caso es que en B3 se escribe “Nombre”, en C3 se escribe “Apellido”, etc. sin considerar de qué celda tengo seleccionada al ejecutar la macro. En este caso la macro no cumplió el objetivo porque la tabla empezaba en C5 y no en B3.
Grabar macros en modo relativo
- Haz click “Usar referencias relativas”.
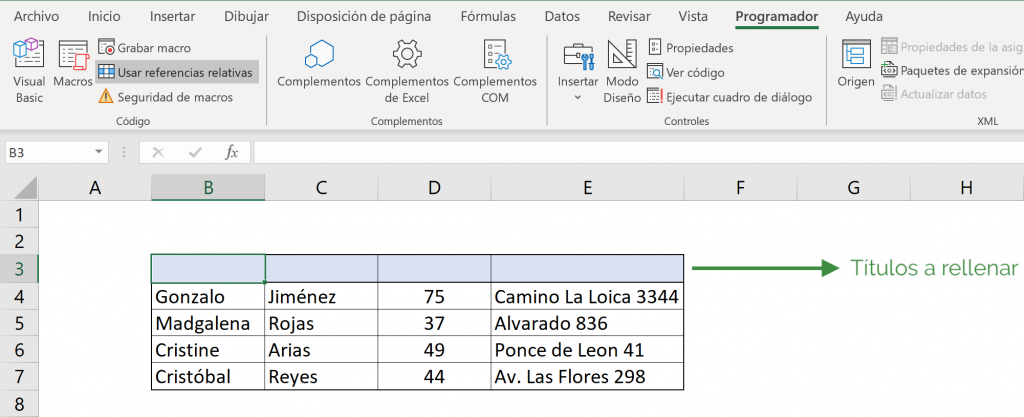
- Debes seleccionar la celda que quieres rellenar (B3), haz click en “Grabar macro”. Nómbrala y guárdala. Nosotros lo llamaremos “MacroRelativoEjemplo”.
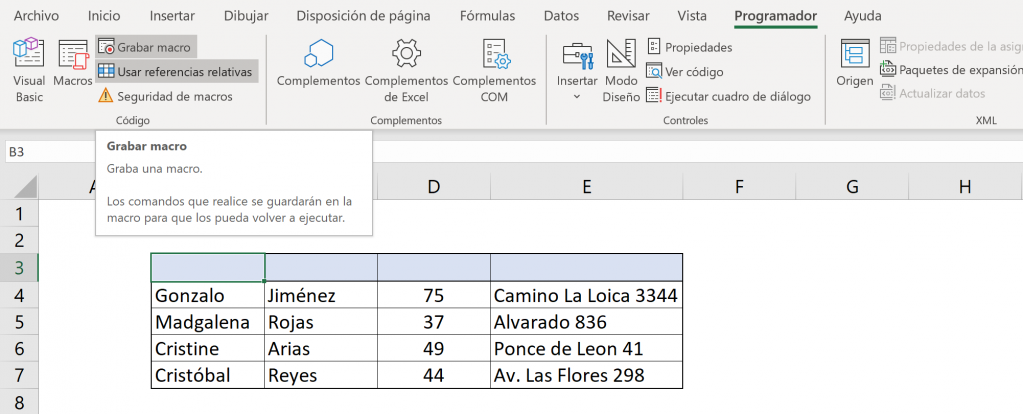
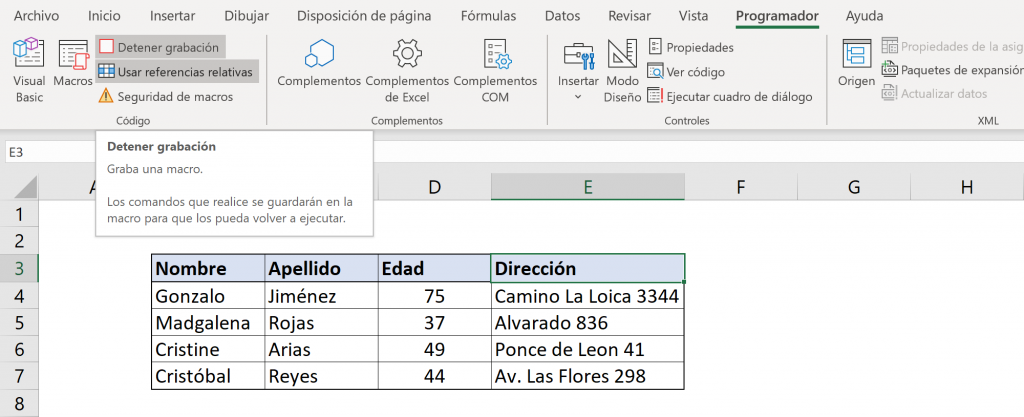
- Luego, rellena los nombres de las columnas como corresponde y haz click en “Detener grabación”.
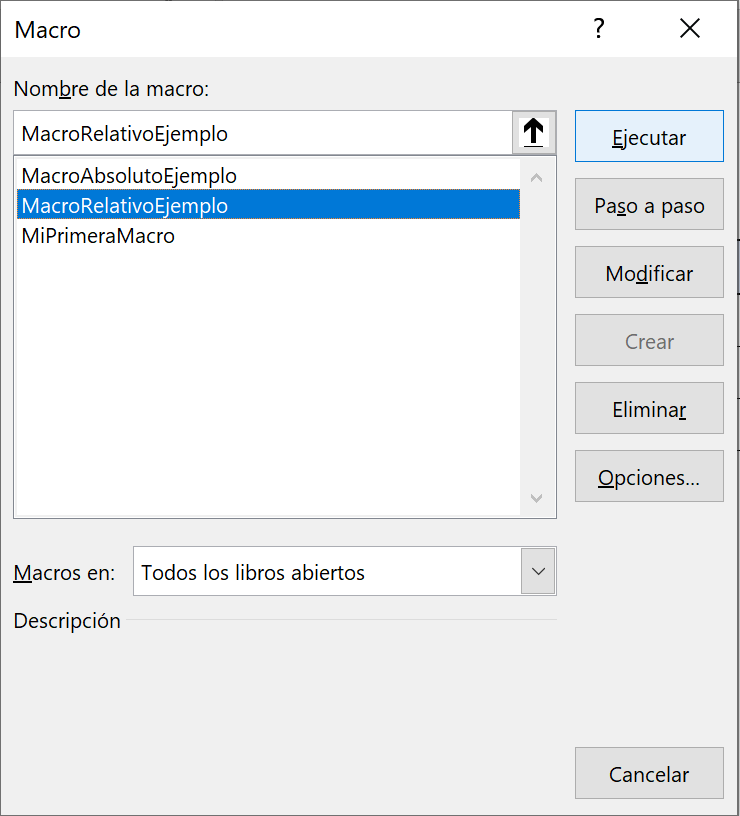
- Ahora, cuando te enfrentes a otra tabla del mismo tipo, en otro Libro o pestaña y haz click en “Macros”.
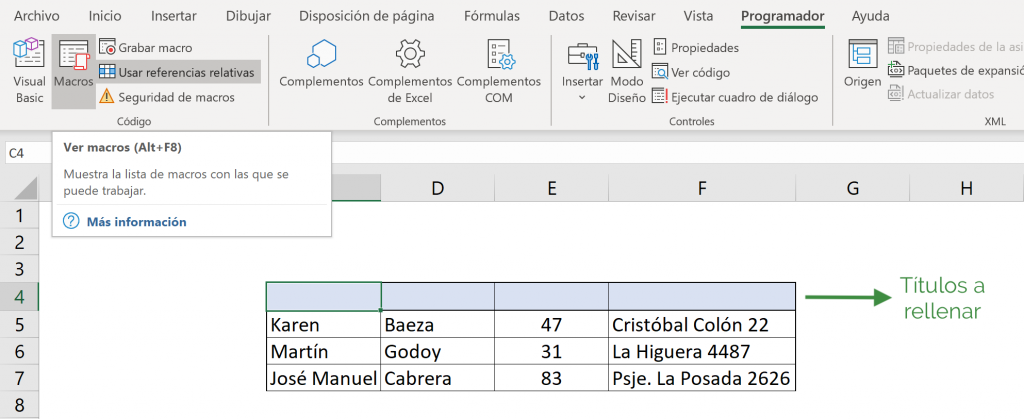
- Elige la macro que creaste y haz click en “Ejecutar”.
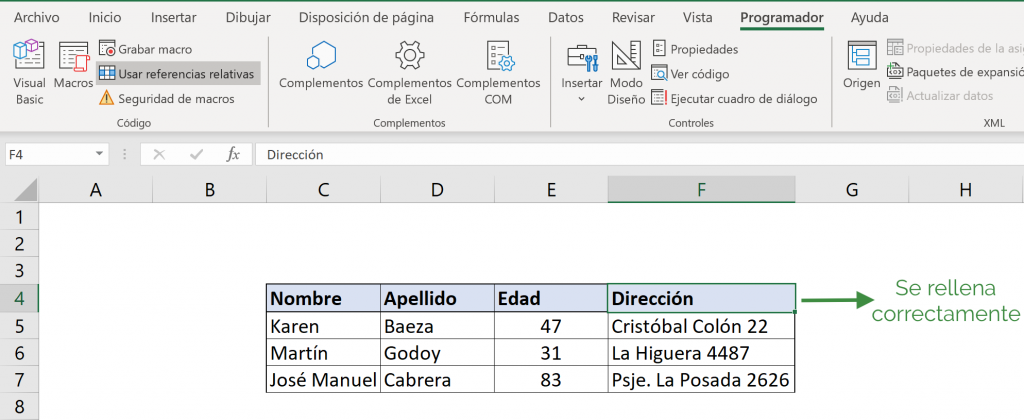
- Ahora se ve que la instrucción se ejecutó tomando en cuenta qué celda tenías seleccionada al iniciar la macro. Al crear la macro se partió en B3 y se escribió en B3, C3, D3 y E3. Así, ahora al seleccionar C4 y ejecutar la macro, se escribió en C4, D4, E4 y F4. Así la macro graba que tiene que escribir “Nombre” en la celda que comenzó seleccionada y luego escribir “Apellido” en la celda que corresponda a la derecha.
Error Común en modo relativo en macros
Un error común al usar macros en Excel es arrastrar fórmulas para rellenar una tabla y creer que con modo relativo se rellenará toda la tabla. Por ejemplo, creaste una macro que crea una columna nueva con una fórmula. Un error común es arrastrar hasta el final de la tabla y creer que la macro funcionará para una tabla con distinta cantidad de filas.
En este ejemplo, usamos referencias relativas para llenar grabar la macro y rellenar la tabla.
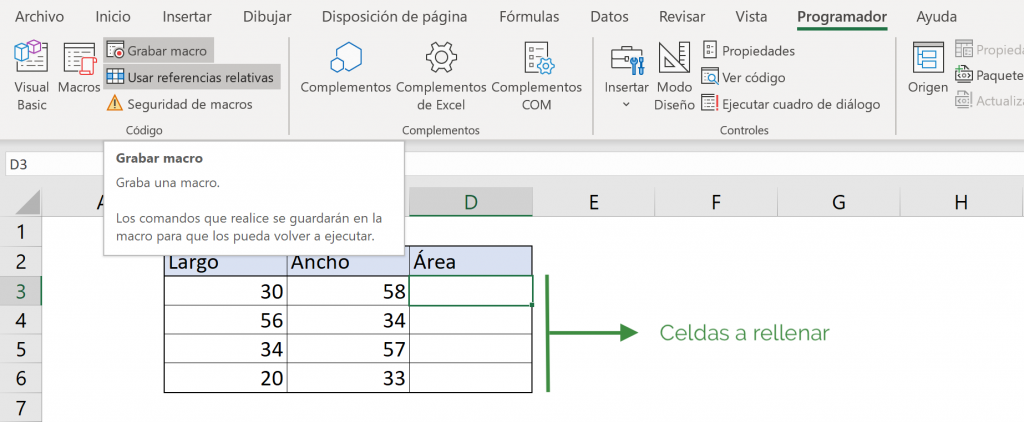
Luego, se puso la fórmula en D3 y se arrastró para rellenar la tabla.
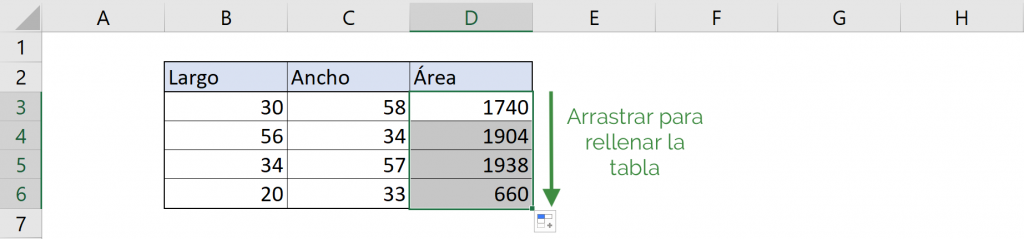
Sin embargo, veamos qué ocurre cuando ejecutamos nuestra macro al enfrentarnos a una tabla diferente: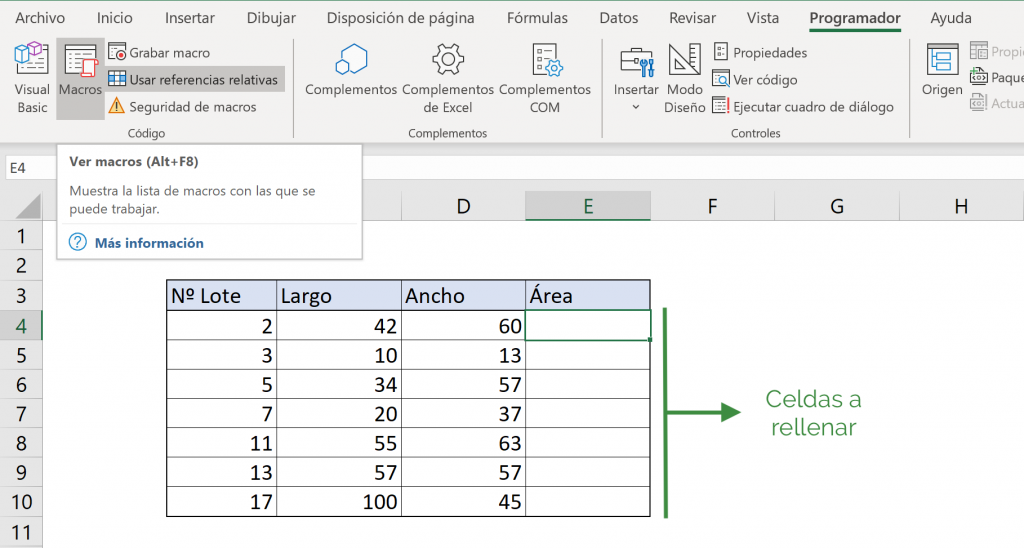
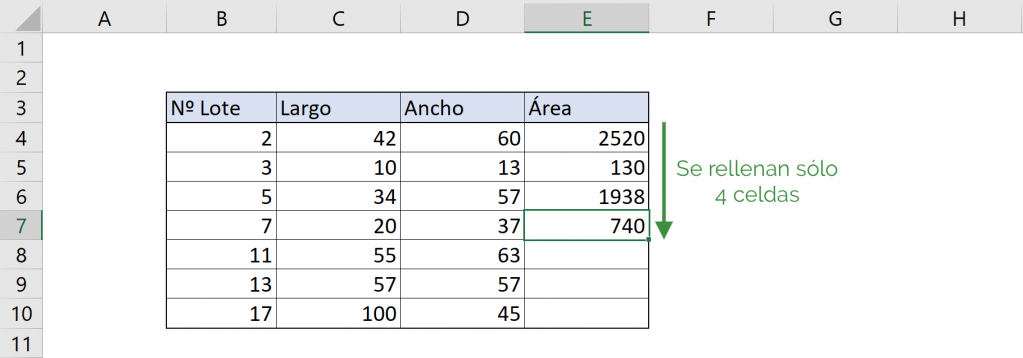
Vemos que al aplicar la macro, no se rellenan todas las celdas de la tabla, sino que solamente se rellena desde E4 hasta E7. Esto pasa porque la la grabación entendió la instrucción “rellenar las tres celdas de abajo”. Para solucionar este problema puede ver el artículo “Dominando VBA”.
Agregar una macro a la barra de herramientas
Agregar una macro a la barra superior de herramientas es muy útil cuando hay acciones que debes realizar muy seguido.
- Crea una macro, en este caso, crearemos una que escriba la fecha del momento en la celda A1. Para eso, haz click en “Grabar macro”.
- Nombra y elige en qué libro vas a guardar la macro.
Tip Ninja: Independiente del lugar que elijas para guardar la macro, el ícono podrá instalarse y aparecerá en todos los Libros que abras de Excel. Si lo guardas en el Libro1 y quieres ejecutarla en el Libro2, tendrás que abrir el Libro1. Si quieres evitar abrir el Libro1 para usar esta macro, puedes guardar en “Libro de macros personal”.
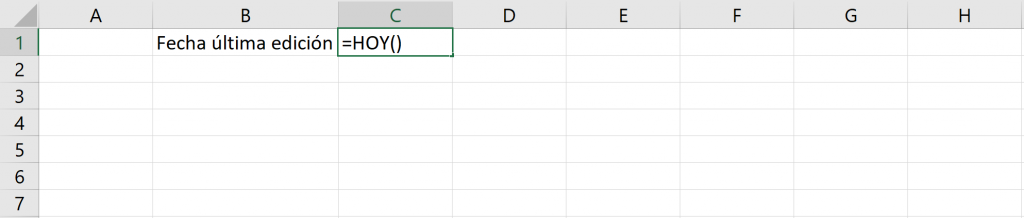
- En la celda A1 escribe “=HOY()” y haz click en “Detener grabación”.
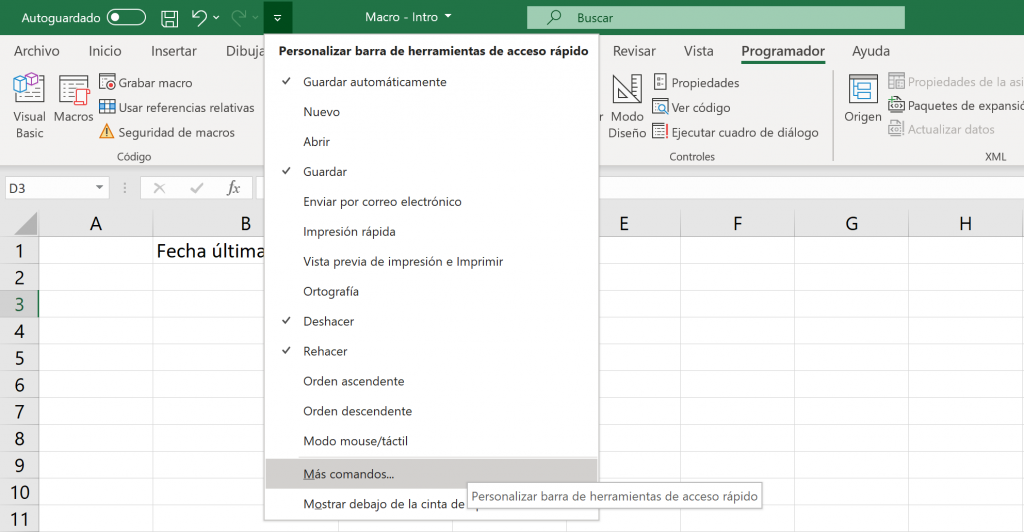
- Una vez finalizada la creación de la macro, haz click en la barra superior verde la flecha hacia abajo y se abre un menú. En ese menú selecciona “Más Comandos”.
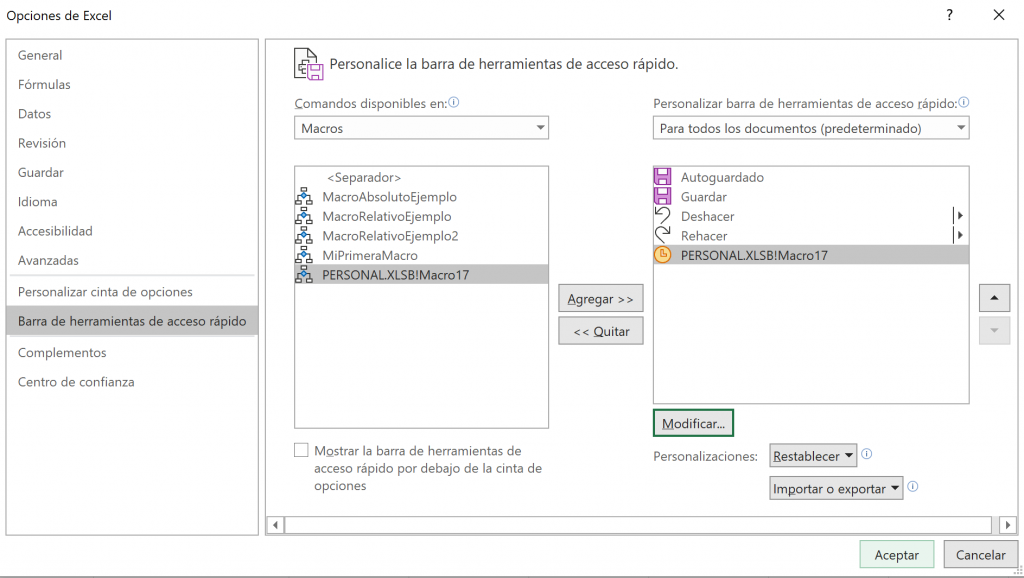
- En la sección de “Comandos disponibles en:” selecciona “Macros”
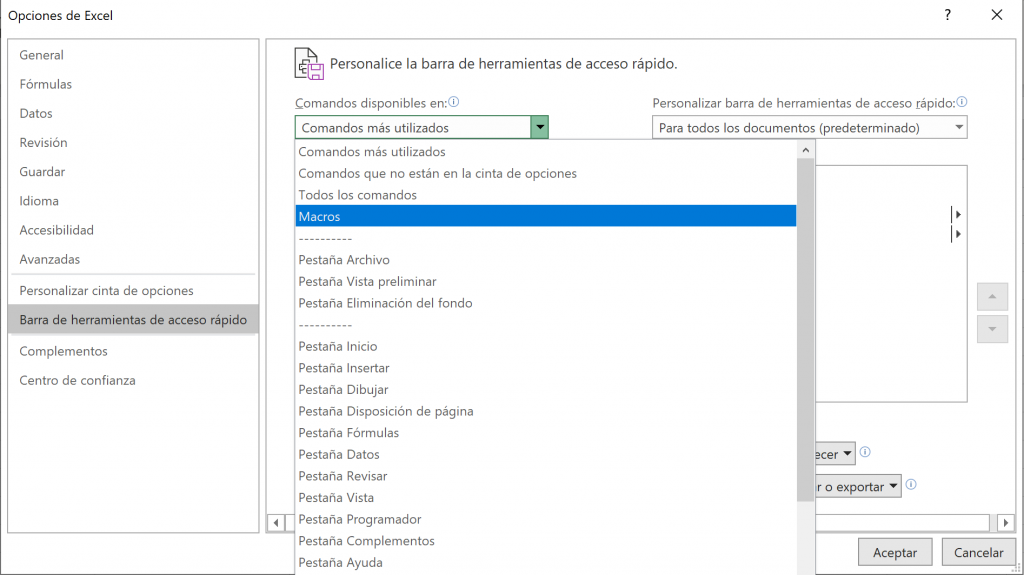
- Selecciona la macro que quieres en la barra de herramientas. En este caso MacroHoy. Haz click en “Agregar”.

- Puedes apretar “Modificar” para elegir el ícono para esa macro. Y haz click en “Aceptar”.
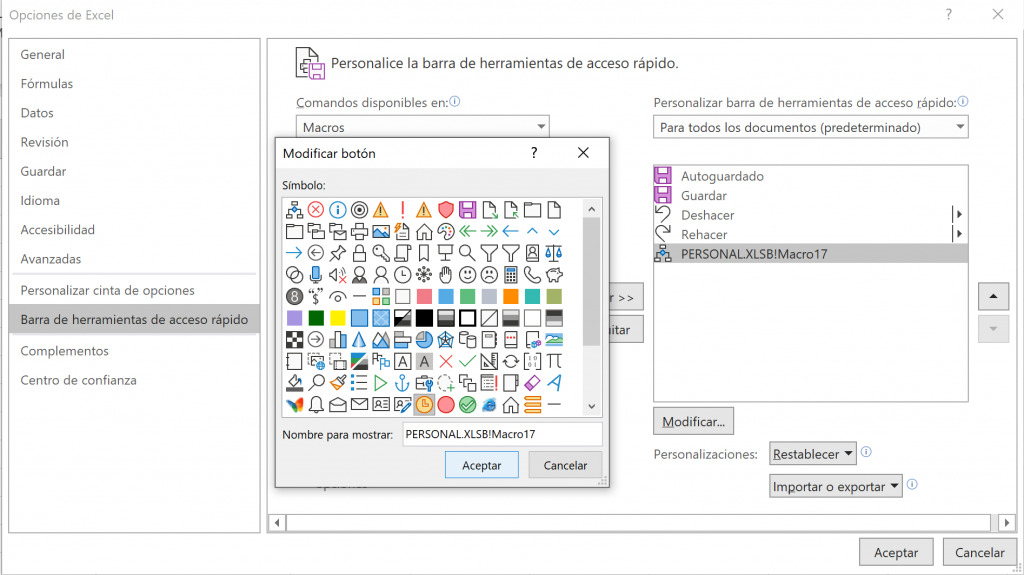
- Luego, volver a hacer click en “Aceptar”.
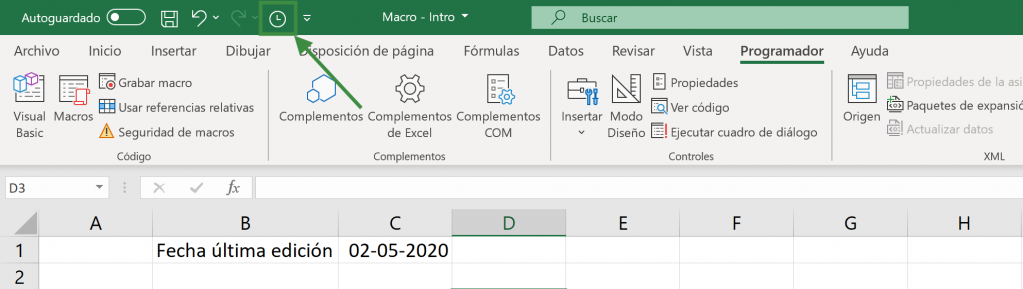
- Ahora puedes ver el ícono de la macro en la barra superior de herramientas. Al apretar el ícono, se ejecuta la macro.
Ejemplos de macros en Excel
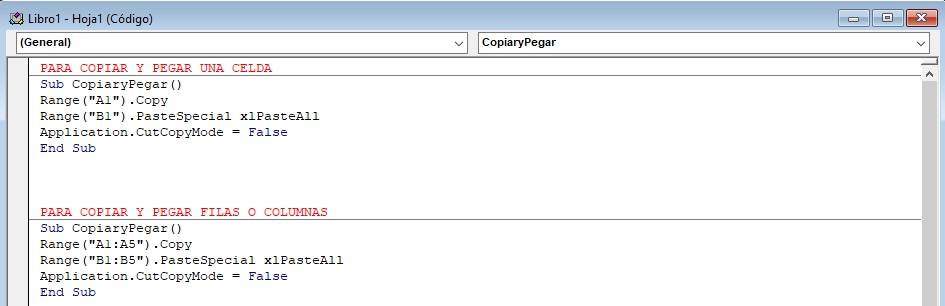
Macro para copiar el contenido seleccionado
Para copiar celdas en la misma hoja en Excel escribe el siguiente código:
Macro para imprimir una hoja
Para imprimir la hoja de Excel actual, escribe el siguiente código:

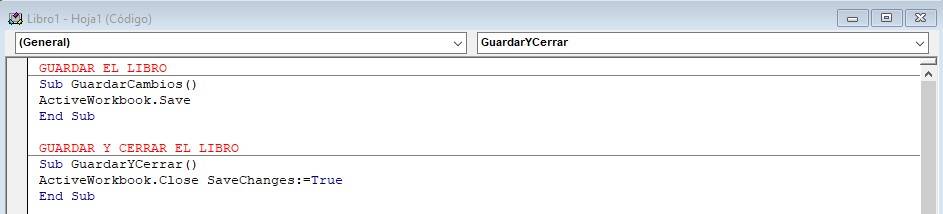
Macro para para guardar archivo
Para guardar un archivo, escribe el siguiente código
Macro para aplicar formato a un rango de celdas
Para cambiar el formato de un rango de celdas, aplica el siguiente código y ajústalo a tu manera.
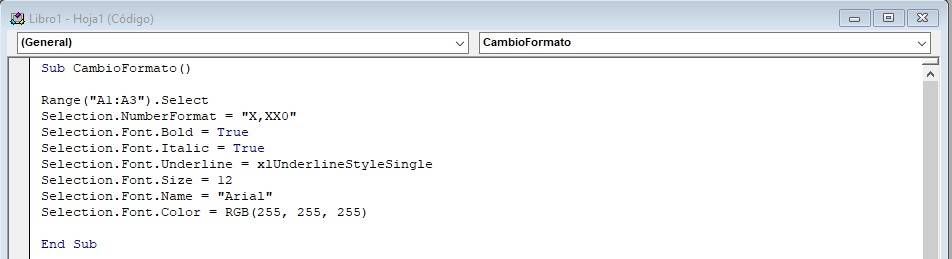
Primero se debe seleccionar el rango de celdas con el código Range ().Select y luego puedes editarlo a tu manera.
Macro para buscar datos en excel vba
Para buscar un valor en una base de datos, escribe el siguiente código. La macro nos dirá la celda que primero coincida con el valor buscado.
 Primero debemos indicar el rango de celdas en las que se desea buscar y luego se determina la celda en la que se encuentra el valor buscado.
Conclusiones
Una macro de Excel es una acción o un conjunto de acciones que se pueden ejecutar todas las veces que se desee. Es una herramienta muy útil ya que permite automatizar tareas repetitivas. Además reduce los errores y el tiempo de trabajo.
Preguntas Frecuentes
¿Cómo crear un formulario en Excel con macros?
Para crear un formulario en Excel sigue los siguientes pasos:
- En la pestaña Programador selecciona Visual Basic.
- En el Editor de Visual Basic selecciona la pestaña Insertar y luego haz click en UserForm.
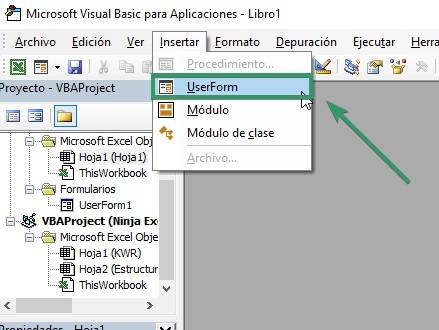
- Listo! Ahora puedes ver el formulario en blanco en el ual puedes agregar los elementos que quieras.
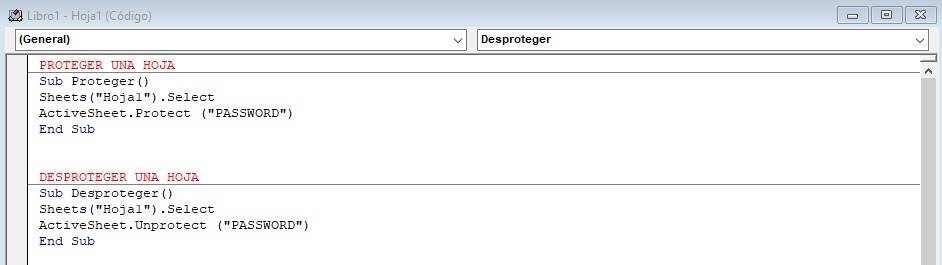
¿Cómo proteger una hoja con macros?
Para proteger una hoja de en Excel utilizando macros, escribe el siguiente códico en el Editor de Visual Basic. Luego debes ejecutar la macro para poder protegerla o desprotegerla.
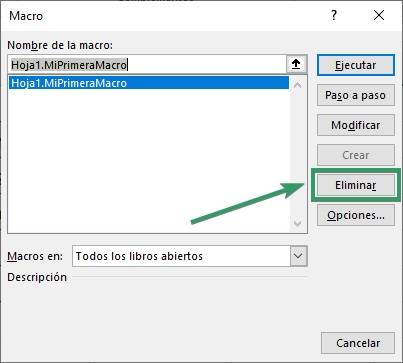
¿Cómo eliminar macros en Excel?
Dentro de la pestaña Programador, haz click en Macros. En el cuadro de diálogo selecciona la macro que quieras eliminar y haz click en el botón Eliminar y listo!
Preguntas Frecuentes
Primero debes tener habilitada la pestaña “programador” que por defecto viene oculta en Excel, luego podrás grabar tus macros
Una Macro es un conjunto de acciones guardadas que nos permite ejecutar cuando lo necesitemos, de esta forma acciones que se suelen hacer manualmente de forma repetida puede ser ejecutada sin necesidad de hacerlo de forma manual
Las Macros son acciones automatizadas que se pueden repetir todas la veces que sean necesarias, se graban los clics y pulsaciones de teclas para luego ser repetidos.
